![]()
To use the configurator to design your platform of choice and save your quotation and drawings to your Customer or Specifier Portal Dashboard – Please follow these instructions:
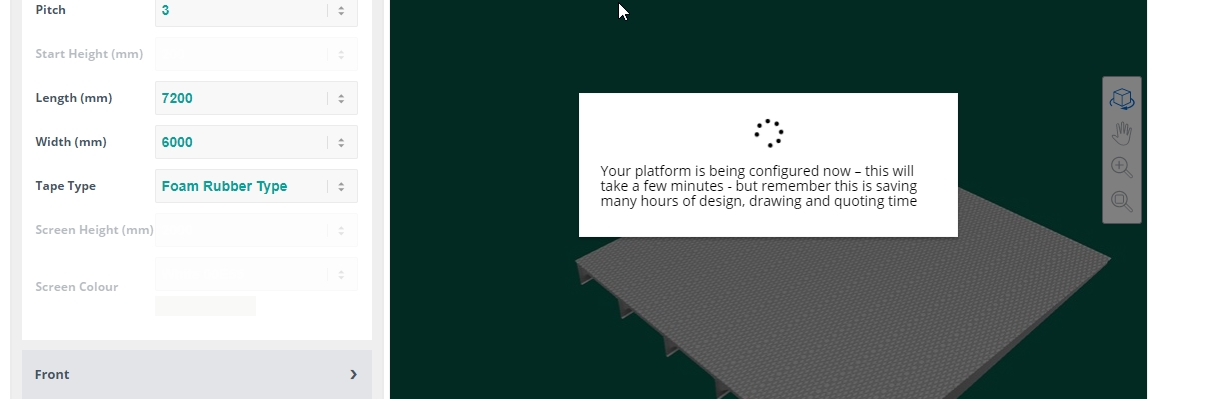
The configurator may load slowly as there are very large amounts of data being processed – so please be patient and remember that this is saving many hours of drawing and quoting time.
If you close the browser tab or window your session will be lost, or if you stop using the configurator for more than 30 minutes it will time out and your session will be lost and you will need to start again – so once you start configuring please continue until you have completed and saved your configuration. You can view other web pages without disturbing your session, but you must do this in a new separate tab.
Only one platform can be configured at a time, but multiple platforms can be included in the same project and on the same quotation. For adding multiple platforms that are identical when you click the Save to Portal button you will be asked to confirm the quantity of platforms of this configuration that you want, if you want more than 1, select the correct number and click the Save to Portal button again. For adding multiple platforms that are not the same, use the same Project Name for each of the configurations and they will be added to that project including its quotation and the drawings as you save them.
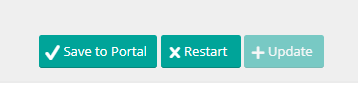
You can save your platform to your Portal Dashboard at any time that you have completed your required selections and updated the drawing, by clicking the Save to Portal button – remember not to close your session off if you wish to add additional platforms to your same project, or to a new project. You can just keep configuring and change the project name as required.
You can return to the start/default setting and begin configuring again at any time using the Restart button, without losing your session.
You can update the drawing after any change has been made to see the change using the Update button. The configuration will only save once the displayed selections have been updated.
The fastest way to configure is to complete all the selections first and then click the Update button to update the drawing and then click the Save to Portal button to save the platform configuration to your quotation and the drawings in your Portal Dashboard.
Step 1.
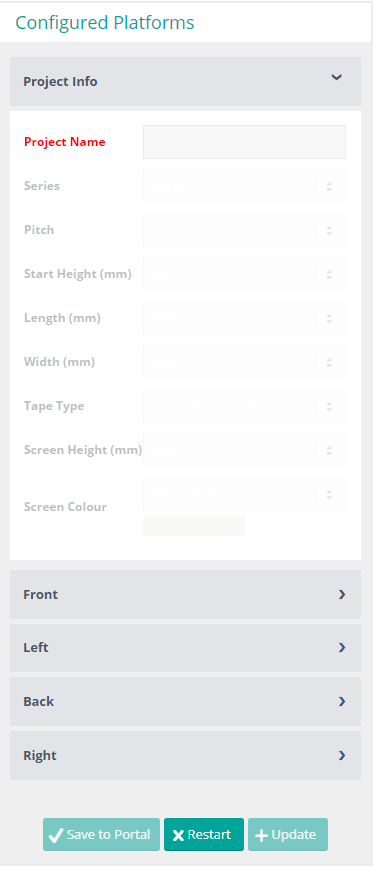
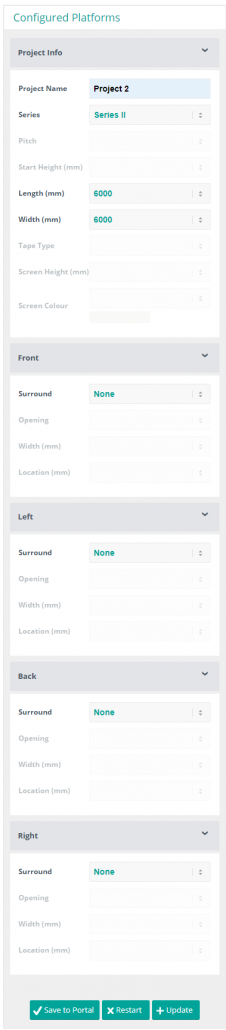
This is how the Configurator will open – fill in the Project Name (this will be the name of the project file in your portal and the name on the drawings and quotation)
Note: You will not be able to proceed with Configuring until you have named the project.
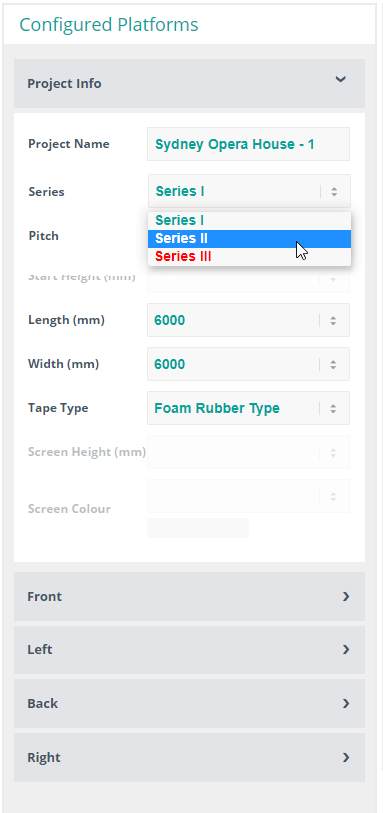
 Step 2.
Select the Platform Series Type by using the dropdown
Note: you can also select a different Series at any time during you configuring process. If the selections already entered are available in the required Series then it will execute the change. And if they are not available, it will revert to the default for the Series selected.
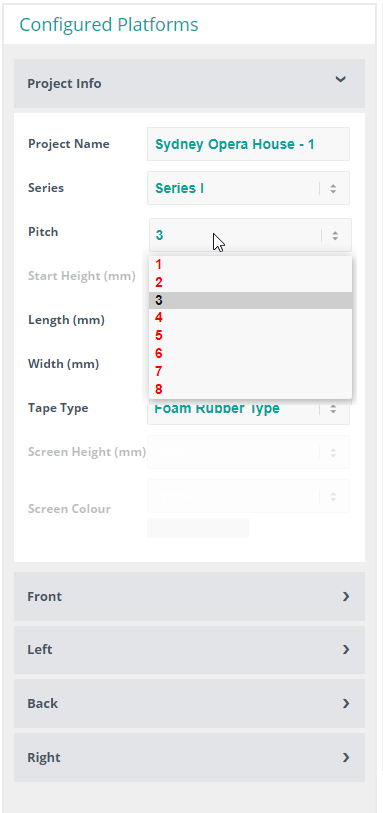
Step 3.
Select the Roof Pitch using the dropdown – for Series 1 and Series 3
Note: The Pitch selection is based on what is manufacturable at the default width of 6000mm – if you require a steeper pitch than what is selectable, you can first reduce the width which will increase the selectable range of pitch.
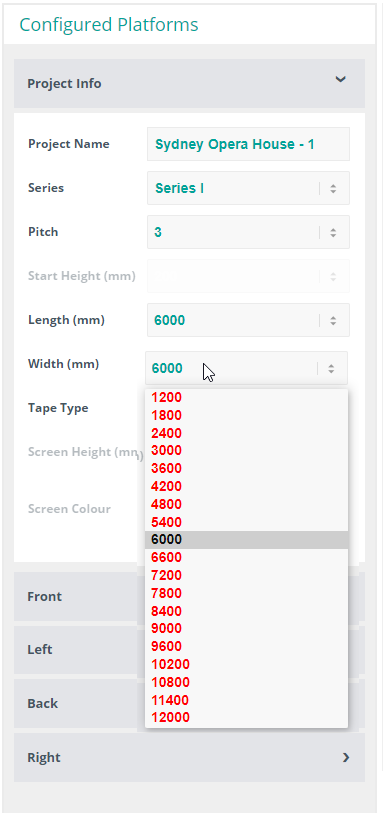
Step 4.
Select the Width (down roof dimension) using the dropdown
Note: The Width selection is based on what is manufacturable at the selected Pitch for Series 1 and for the selected pitch and default Start Height for Series 3.
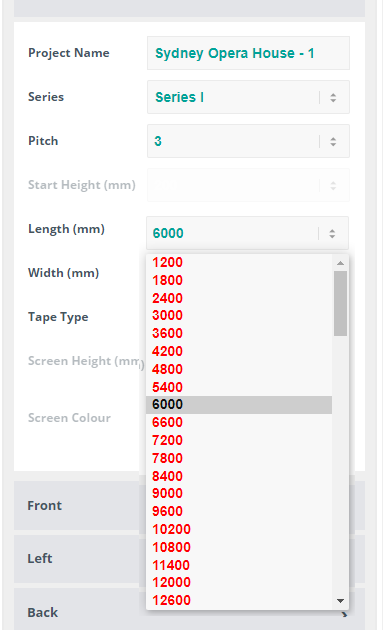
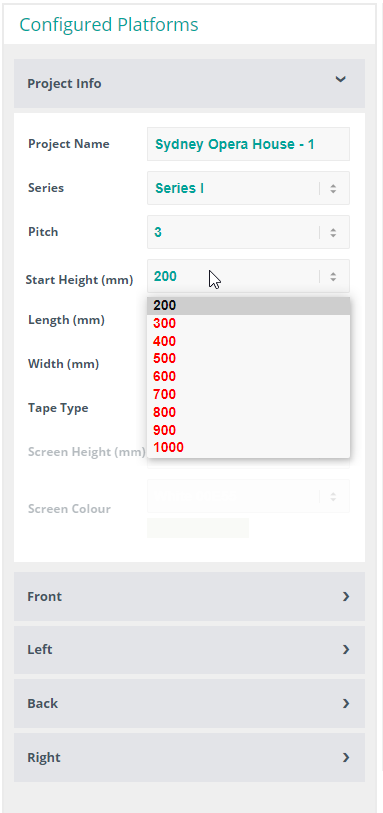
Step 5.
Select the Length (across roof dimension) using the dropdown.
Step 6.
Select the Start Height by using the dropdown – this is only for Series 3
Note: This is the distance from the roof surface to the platform surface on the short (up roof) end of the platform
Note: The Start Height selection is based on what is manufacturable at the selected Pitch and the selected Width – if you require a higher Starting Height than what is selectable, you can first reduce the Width which will increase the selectable range of Start Height.
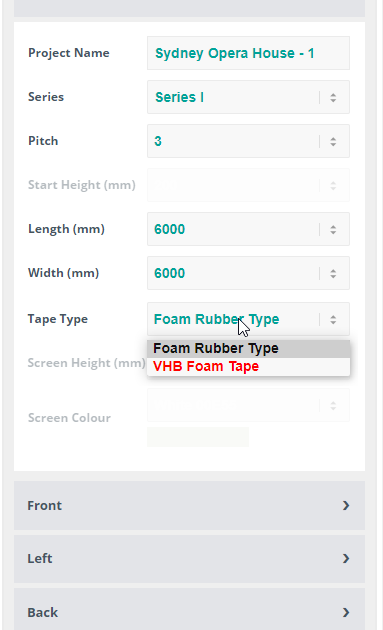
Step 7.
Select the Tape Type by using the dropdown – this is for Series 1 and Series 3
Note: Foam Rubber Tape is the most common – VHB Foam Tape is for adhering the platform to the roof surface.
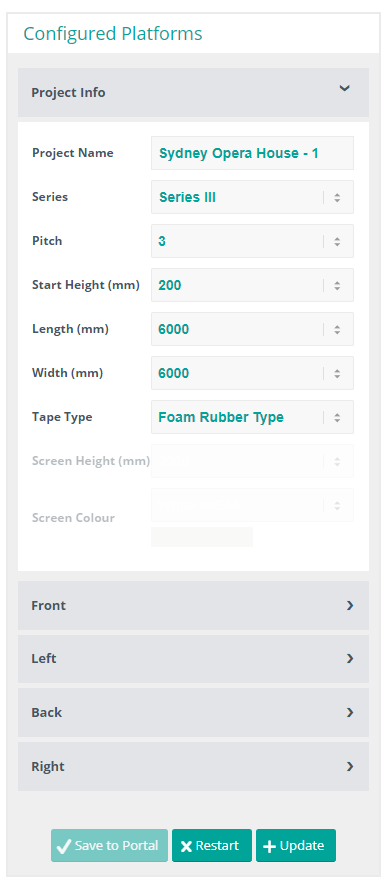
Step 8.
If you do not require any surrounds then click the Update button and the drawing will update – this will take a short while as a lot of data is being processed. Once the drawing is updated, rotate the drawing to the desired view and click the Save to Portal button. Your quotation, and drawings will be saved to your portal.
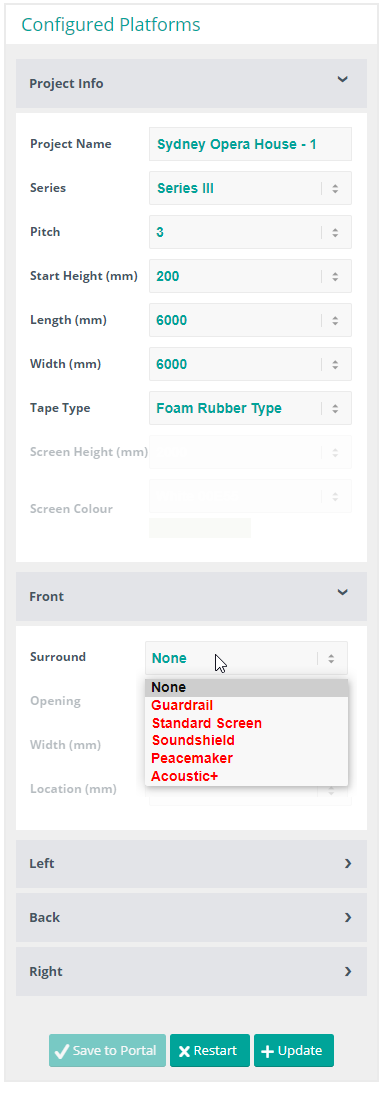
Step 9.
Select the Surround Type for each side – by using the dropdown
Note: the default ‘None’ will leave that side open
Note: Check the orientation of the Front, Left, Back and Right of the platform using the view cube in the top right hand corner of the screen.
Step 10.
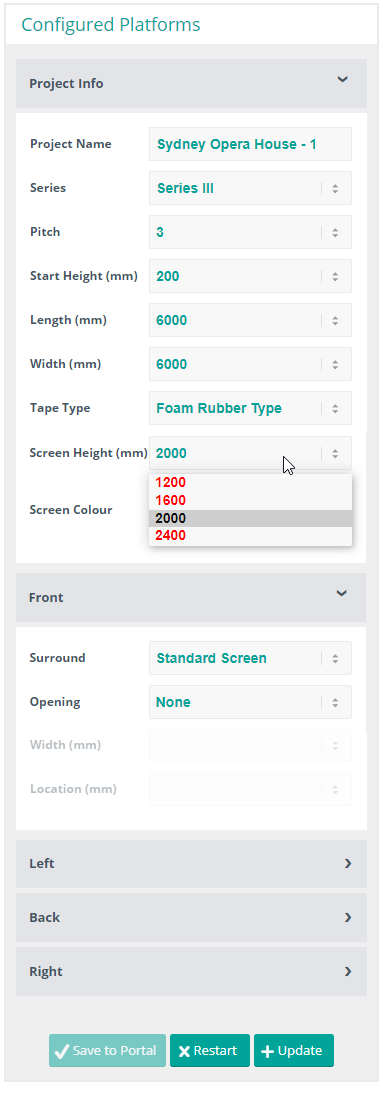
If Standard Screen, Soundshield, Peacemaker or Acoustic+ are selected the Screen Height will default to 2000mm
Select the Screen Height by using the dropdown
Note: The Screen Height remains constant for each of the sides that have any of the above 4 screening options.
Step 11.
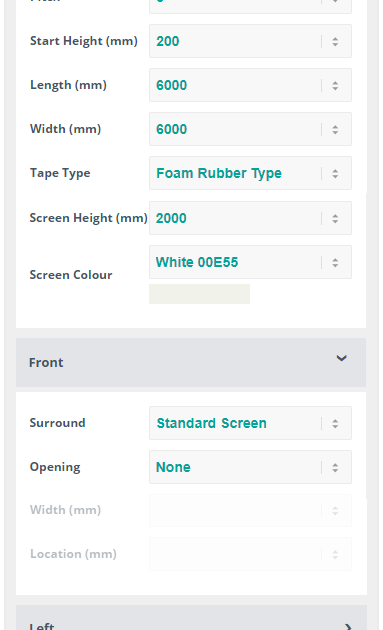
If Standrard Screen, Soundshield, Peacemaker or Acoustic+ are selected the Screen Colour will default to White
Enter you required Screen Colour if it is not white
Note: The Screen Colour remains constant for each of the sides that have any of the above 4 screening options.
Step 12.
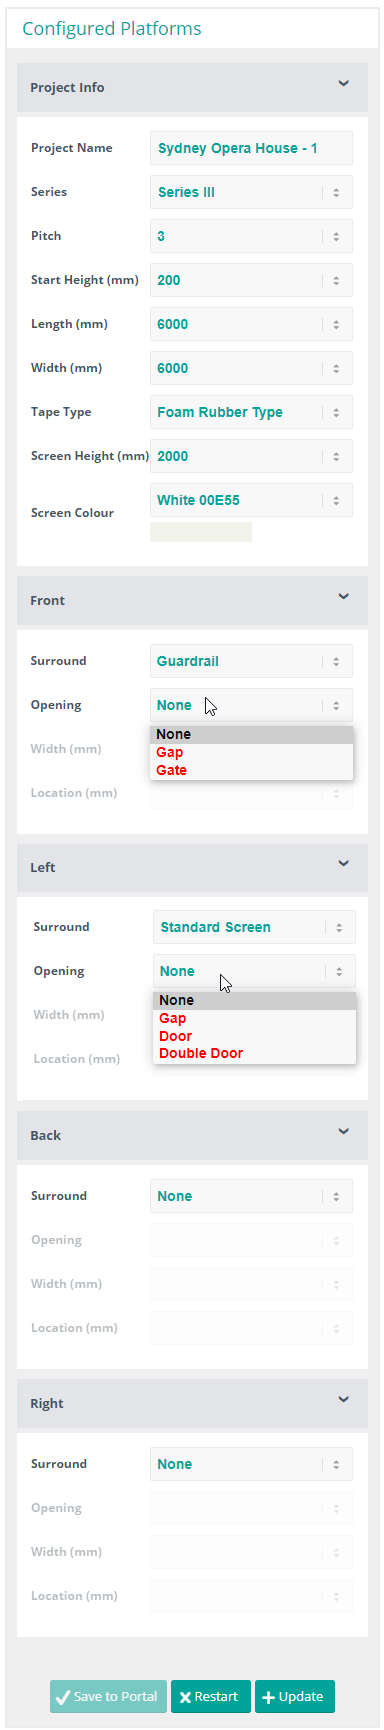
Once the Surround Type is selected, the Opening will default to ‘None’, if no opening is required for access then leave the selection as ‘None’
If an Opening is required select the opening type by using the dropdown
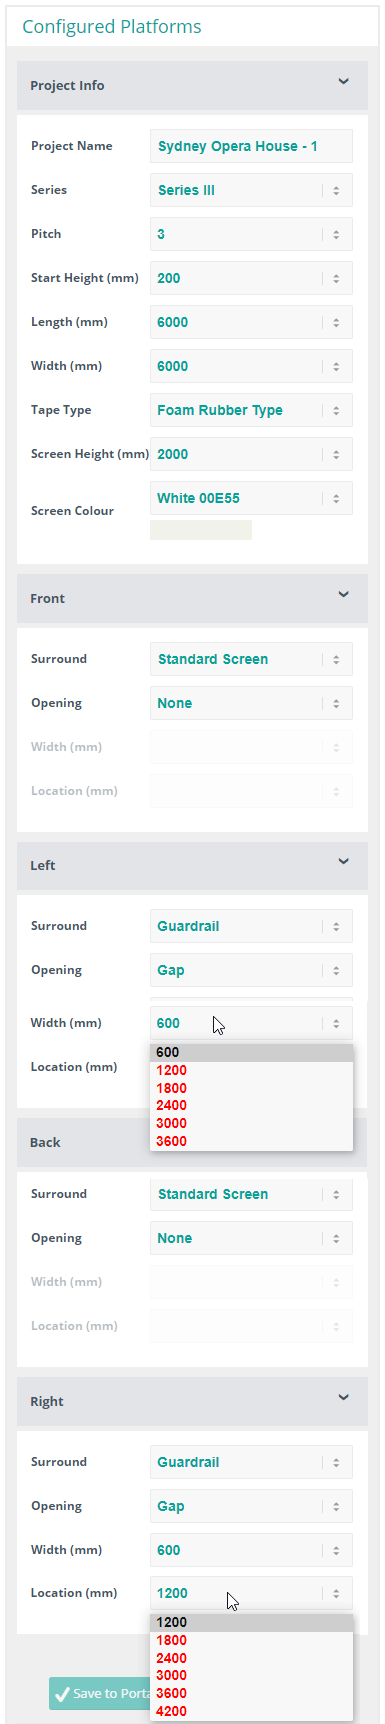
Note: Guardrail has Gap or Gate as selectable options
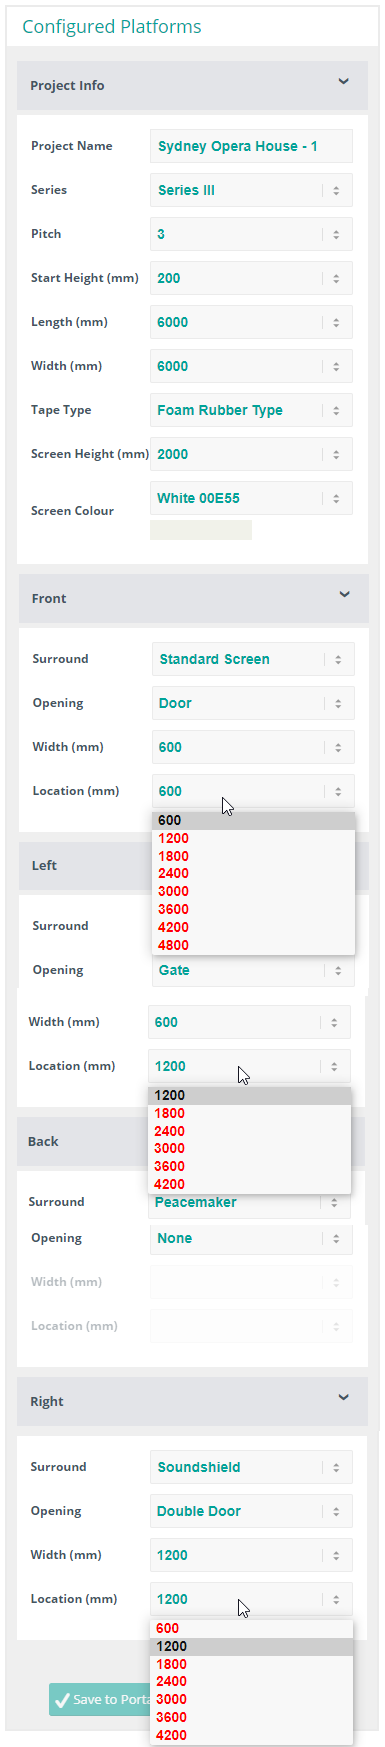
Note: The other 4 Surround Options have Gap, Door and Double Door as options.
Step 13.
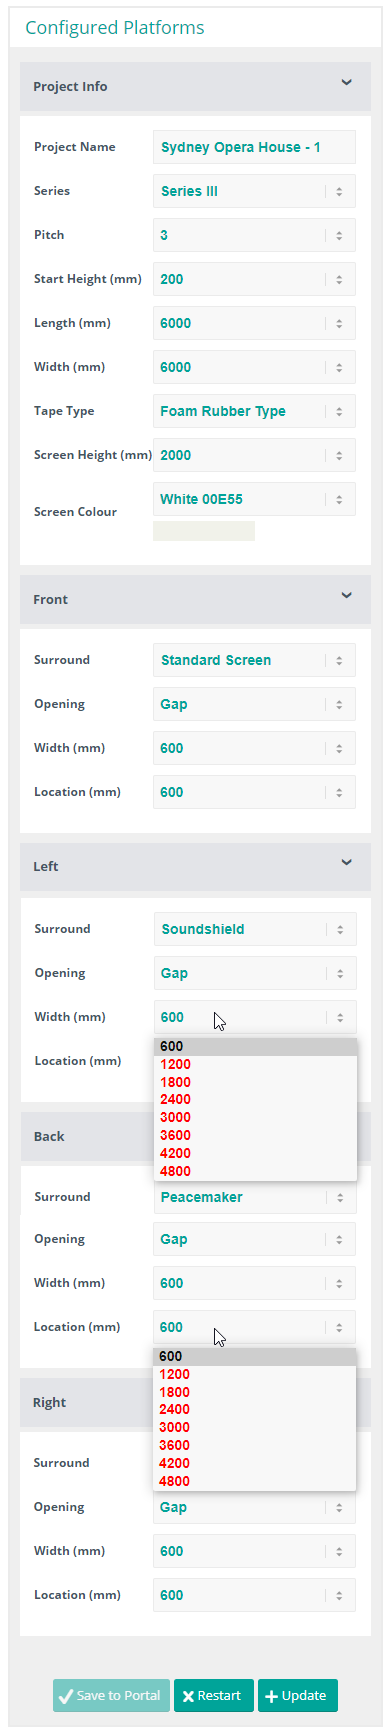
If Gap is selected for any of the 4 screen options the Opening Width will default to 600 and the Opening Location (the distance from the left hand side when viewing the platform) will default to 600 also.
Select the Opening Width and the Opening Location by using the dropdowns
Note: All of the 4 screen options need to start and finish the run with a minimum of 600 from the corners.
The Opening Width selection is based on the selected Opening Location and allows for the Gap to stop 600 before the end of the platform.
The Opening Location selection is based on the selected Opening Width and allows for the Gap to stop 600 before the end of the platform.
Step 14.
If Gap is selected for Guardrail the Opening Width will default to 600 and the Opening Location (the distance from the left hand side when viewing the platform) will default to 1200
Note: All the Guardrails need to start and finish the run with a minimum of 1200 from the corners, so:
The Opening Width selection is based on the selected Opening Location and allows for the Gap to stop 1200 before the end of the platform.
The Opening Location selection is based on the selected Opening Width and allows for the Gap to stop 1200 before the end of the platform.
Step 15.
If Door or Gate is selected the Opening Width will default to 600 and will not be selectable
If Double Door is selected the Opening Width will default to 1200 and will not be selectable
The Opening Location selection is based on the selected Opening Width and allows for the Door or Double Door to start or stop a minimum of 600 from the corners of the platform for any of the 4 screen options. And allows for a Gate to start or stop a minimum of 1200 from the corners of the platform for Guardrail.
Step 16.
Once you are satisfied that all your selections are complete and correct click the Update button and the drawing will update – this will take a short while as a lot of data is being processed. Once the drawing is updated, rotate the drawing to the desired view and click the Save to Portal button.
Trouble Shooting
- I cannot begin configuring? – You must provide a Project Name – this is your first selection, and you cannot continue configuring until this is done.
- It is loading very slowly? – This is normal as there are very large amounts of data being processed – so please be patient and remember that this is saving many hours of drawing and quoting time.
- My configuration has disappeared? – You have closed your browser tab or window or navigated to another web page using your same browser tab, or your session has timed out due to inactivity – you will need to begin a new session.
- I want to update but the Update button is greyed out? – You have not made any additional selections that require updating – the Configuration is already updated.
- I want to save the configuration but the Save to Portal button is greyed out? – You need to first update the configuration by clicking on the Update button, once it has updated then the Save to Portal button will be available.
- I have made some incorrect selections and can’t change them? – You can change any incorrect selections, but some selections are interdependent on other selections, therefore sometimes you need to change another selection before the one you are trying to change – so it may be easier for you to click the Restart button to begin again from the default setting.
- The configurator is not making the selections I need available? – You may just need some assistance or your selections may not be manufacturable – please call our Customer Service Team on 100 200 300 or email them at TechnicalSupport@configuredplatforms.co.uk
Please remember – our customer service team is ready to help you with this process and can screen share and step you through it on your own screen or on ours.
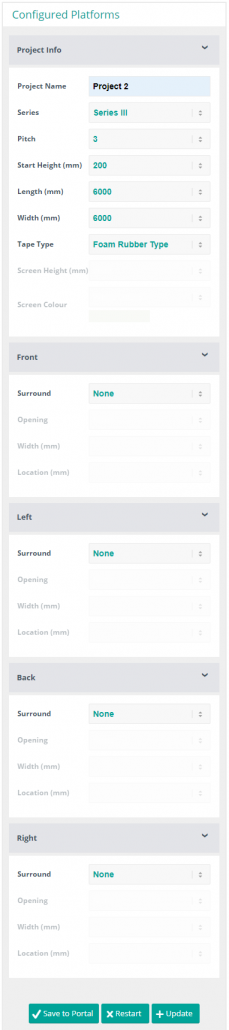
This is the default for Series 2
This is the default for Series 3